
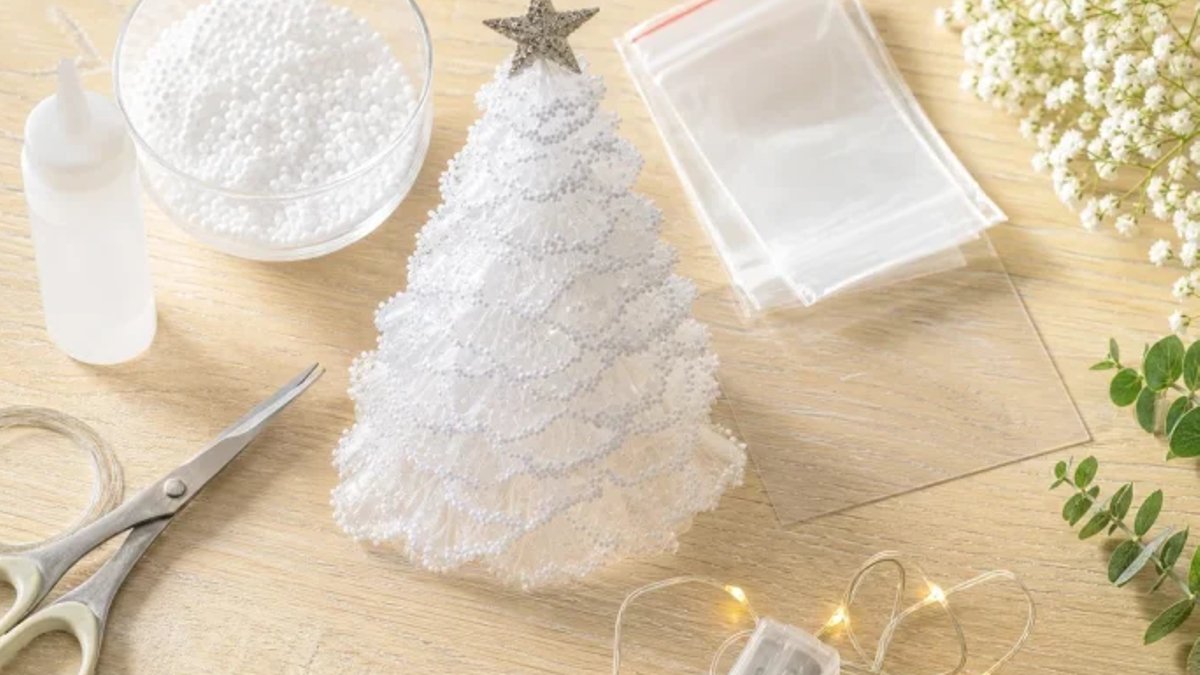
Looking for a unique holiday decoration? Try making mini Christmas trees from plastic bags. These delicate trees, with their frosted ruffles, catch the warm glow of LED lights, resembling snow-covered fir branches.
What You’ll Need
The supply list is short and affordable. You’ll need clear plastic bags or cellophane film, an empty plastic bottle or clear acetate for the tree body, small white foam beads, clear-drying craft glue, scissors, thin craft wire or thread, a battery-operated warm-white LED string, and a small star for the top.
Most of these items can be found in your kitchen drawer or at craft stores like Michaels, Target, or Hobby Lobby. The size of the tree is up to you, ranging from a 6-inch tree for a windowsill to a 12-inch one for the mantel.
Making the Mini Trees
The process involves eight simple steps, requiring no heat or special tools. First, cut the plastic bags into 4 x 2-inch strips, accordion-fold them into ruffles, and secure one end with wire or thread. Then, shape the film by hand, flaring the outer edges gently to create a soft, feathery ruffle effect.
Next, add the snow effect by gluing white foam beads along the edges of each ruffle. Prepare the cone-shaped base using acetate or a cut-down plastic bottle, ensuring the bottom edge is level. Attach the ruffles to the cone, starting at the bottom rim and overlapping each row slightly as you climb.
Once the layers are set, add a small battery-powered LED string inside the cone, using warm-white lights for a cozy glow. Finish by decorating the tree with a small star on top and straightening the ruffles. These trees look best in groups of three or more at different heights, paired with white ceramics, silver ornaments, and bare branches for a wintry scheme.
A safety note: small foam beads pose a choking hazard to children and pets, so store craft supplies out of reach. Additionally, these trees don’t pack well, so store them upright in a shoebox with a crumpled paper collar to maintain their shape for next year.
This DIY project offers a creative way to repurpose plastic bags, resulting in a unique and festive decoration. The combination of translucent film, warm LED lights, and white accents creates a frosted, wintry character that’s perfect for the holiday season.
The process, while detailed, is straightforward and requires only basic crafting skills. With a little patience and attention to detail, one can create a beautiful, one-of-a-kind decoration that will add a touch of whimsy to their holiday display.
In a world where mass-produced decorations dominate the market, these mini Christmas trees offer a refreshing change of pace.
One important detail to keep in mind is the type of glue used. Not all craft glues bond to polyethylene, so be sure to check the label before purchasing. A clear-drying glue that’s rated for plastic is essential to ensure the ruffles stay securely attached to the cone.
Tips and Tricks for Success
To ensure your mini Christmas trees turn out perfectly, work in batches of ten ruffles at a time. This assembly-line approach is more efficient than working one-at-a-time. Use a rimmed baking sheet or shallow box to contain foam beads, preventing them from scattering.
Static can cause foam beads to cling to unwanted areas. Wipe the film with a dryer sheet to minimize this issue. Creating three trees of varying heights simultaneously will result in a more visually appealing grouping.
Storing Your Mini Trees
These delicate trees require careful storage to maintain their shape. Avoid crushing them into a bin; instead, stand them upright in a shoebox with a crumpled paper collar around the base. This method ensures they remain intact and ready for the next holiday season.
The trees’ fragile nature means they pack down poorly, so proper storage is essential to preserve their appearance. By following this simple storage technique, you can enjoy your unique decorations year after year.
Styling and Safety
For a cohesive holiday display, group three or more trees of different heights together. Place them on a windowsill, sideboard, or side table, paired with white ceramics, silver ornaments, bare branches, and a plain wood tray or slab of unfinished pine.
Remember, small foam beads pose a choking hazard to children and pets. Keep craft supplies and finished decorations out of reach.
The images in this article, generated with advanced AI models, accurately represent the final product. With these tips and safety precautions in mind, you can create a stunning and unique holiday decoration that will be the talk of your neighborhood. The warm glow of the LED lights, combined with the frosted ruffles, will bring a cozy and wintry atmosphere to your home.


